 By Editorial Team
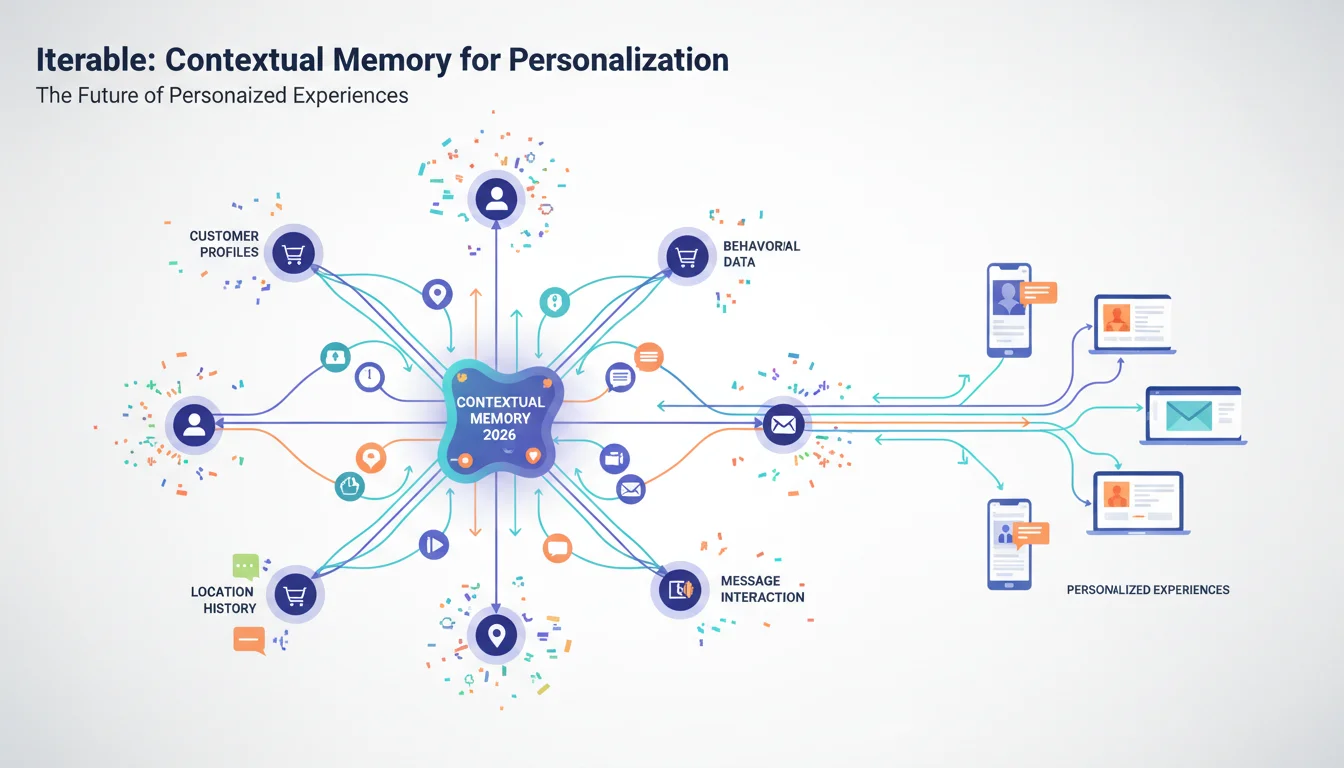
By 2026, if your marketing platform can’t remember and act on what individual customers do, you’re falling behind. Iterable calls this contextual memory. It’s what lets you get past generic segments and create experiences that actually feel personal, moving far beyond just using a first name token. So how do you get this level of personalization working in your own campaigns?
Key Takeaways
- Get your data foundation right by setting up custom events and user profile fields in Iterable. This is the bedrock of contextual memory.
- Use Handlebars logic to build dynamic content blocks that pull in real-time user data for personalized messages, product recommendations, or offers.
- Build segments based on what users have actually done, then design multi-channel journeys that can change on the fly based on their actions.
- Don’t ‘set it and forget it.’ Constantly check and clean up your event tracking and personalization rules to make sure your data’s good and your messages stay relevant.
Understanding Iterable’s Contextual Memory Framework
Iterable’s take on contextual memory is all about making data immediately actionable. The system needs to know a user’s recent buys, what they browsed, which channels they prefer, and what they told you in a survey last month. It’s all built on two pillars: custom events and user profile fields. If you don’t get the data capture right here, your personalization will fail. It’s no surprise that while an eMarketer report shows “71% of consumers expect personalization,” only 40% think brands are actually delivering, usually because their data is a mess or can’t be used in real time.
Step 1: Defining and Capturing Custom Events
To build any kind of useful contextual memory, you have to start by tracking what matters. These are your custom events. I’m not talking about basic email opens. You need to be tracking things like “product_viewed,” “item_added_to_cart,” “review_submitted,” or “support_ticket_opened.” Every event needs to carry properties that give you the details, so a “product_viewed” event should also tell you the product_id, category, and price.
1.1 Navigate to Event Management
Inside the Iterable platform, go to the left-hand navigation and click Settings, then pick Events from the submenu. This is where you’ll find all the default events and any custom ones you’ve already made.
1.2 Create a New Custom Event
- Click the + New Event button in the top right.
- Give it a clear Event Name (e.g.,
product_comparison_viewed). No cryptic codes. - Add your Event Properties by clicking + Add Property. For our example, you could add
product_id_1(String),product_id_2(String), andcomparison_session_duration(Number). Getting the data type right is important for how you’ll use it later in segmentation. - Write a short Description for your team so everyone knows what this event is supposed to be tracking.
- Click Save Event.
Pro Tip: Map this stuff out first. If you track too much, you’ll drown in data noise. If you track too little, you’ll have big blind spots in your customer knowledge. I always tell people to map out their customer journeys and then figure out the key moments where an event would tell you something important about their intent.
Common Mistake: Messy naming conventions for event properties. If one team uses productID and another uses productId, I guarantee your segmentation and dynamic content will break down the line. Standardize this from day one.
Expected Outcome: You’ll have a custom event defined in Iterable that’s ready for your website, app, or backend to start sending data to. You can see it in the Event Management list and check that it’s working.
Step 2: Enriching Profiles with Custom User Fields
Events capture what a user *does*, but custom user profile fields capture who a user *is*. These fields hold static or semi-static info like demographic details, their loyalty tier, or aggregated scores. A field like preferred_brand or last_category_browsed can be a goldmine for personalization.
2.1 Access User Profile Field Settings
From the dashboard, go to Settings > User Profile Fields. You’ll see a list of all existing fields, both the standard ones and your custom ones.
2.2 Define a New Custom User Field
- Click the + New User Field button.
- Enter a Field Name, like
customer_lifetime_value_tier. - Pick the right Data Type (e.g., String for values like “Gold” or “Silver,” or Number if it’s a score).
- Add a Description that explains where this data comes from and what it means.
- Click Save Field.
Pro Tip: Think about the source of truth for every field. Does it come from your CRM via API, or is it calculated inside Iterable from user behavior? Documenting this is a lifesaver for data integrity. You’re trying to build a complete picture of your customer so every interaction can be smarter.
Common Mistake: Creating fields for data you could just get from events. Don’t make a “last_product_purchased” field if you already have “purchase” events with all the product info. Instead, you might create an aggregated field like “most_frequently_purchased_category,” which is much more useful.
Expected Outcome: You’ll have a new user profile field that’s ready to use in segments, dynamic content, and targeting. It will show up on user profiles and can be filled via API or a simple CSV upload.
Step 3: Implementing Dynamic Content with Handlebars
Now that you’ve got events and user fields feeding your contextual memory, you can use that data to stop sending generic emails. Iterable uses Handlebars.js for this, which lets you slot in user-specific info, change message blocks, or show product recommendations based on what you know about someone.
3.1 Creating a Dynamic Content Block
Let’s imagine you want to recommend products using a user’s last_category_browsed field and their recent product_viewed events.
- In a campaign template, grab an HTML Block or Text Block and drop it where you want it.
- Now you write the Handlebars logic. For example, to greet a user and show them products from the category they were just looking at, your code might look something like this:
Hello {{user.firstName}}, We noticed you were browsing our {{user.last_category_browsed}} collection recently. Here are some top picks you might like: {{#each (lookup_products_by_category user.last_category_browsed limit=3)}} <p><a href="{{this.url}}">{{this.name}} - ${{this.price}}</a></p>
{{/each}} If you're looking for something different, perhaps these new arrivals in our {{lookup_user_most_frequent_category user.email}} section will catch your eye: {{#each (lookup_products_by_category (lookup_user_most_frequent_category user.email) limit=2)}} <p><a href="{{this.url}}">{{this.name}} - ${{this.price}}</a></p>
{{/each}}
Note:
lookup_products_by_categoryandlookup_user_most_frequent_categoryare illustrative custom Handlebars helpers that would need to be defined or integrated with your product catalog and user event history, respectively. Iterable’s Data Feeds and Catalog features often support this without custom helpers. - Always use the Preview function to test your logic. You can check how the content will look for specific users to make sure it’s pulling the right data.
Pro Tip: Always have a fallback. You have to anticipate that a field like `user.last_category_browsed` might be empty, so use an `{{#if user.last_category_browsed}}…{{else}}…{{/if}}` structure to show a default message or generic recommendations. This prevents ugly blank spaces and broken-looking emails.
Common Mistake: Trying to build overly complex Handlebars logic right out of the gate. Start simple. Just use their first name or mention their last purchase. You can build up to more complicated things once you’ve got reliable data flowing in.
Expected Outcome: Your campaign messages will adapt to each recipient’s profile and recent behavior, which directly leads to higher engagement. As HubSpot found, personalized calls to action convert 202% better than generic ones. It works. HubSpot
Step 4: Building Contextual Segments and Journeys
This is where all that data setup pays off. You can use contextual memory to build hyper-targeted segments and orchestrate multi-channel journeys that react to what people are doing. You stop thinking in broad segments and start targeting tiny, specific groups based on a mix of their profile and recent actions.
4.1 Creating a Dynamic Segment
Let’s make a segment of users who checked out the “Electronics” category in the past week but didn’t buy anything from it.
- Go to Audiences > Segments in the dashboard.
- Click + New Segment.
- Name it something clear, like
Recent_Category_Browsers_No_Purchase. - Add a filter: User has performed event >
product_viewed> in the last 7 days. Then add a property filter to that event:category> is equal to > “Electronics”. - Add a second filter: User has NOT performed event >
purchase> in the last 7 days. Add another property filter here, too:purchased_category> is equal to > “Electronics”. - Click Save Segment.
4.2 Designing a Contextual Journey
Now, we’ll use that segment to try and re-engage those users.
- Go to Journeys > New Journey.
- Start with a Blank Journey.
- For the Entry Source, select your new segment:
Recent_Category_Browsers_No_Purchase. You can have users enter right away or on a schedule. - Add a Wait step for 1 hour.
- Add an Email step using dynamic content to recommend specific products from the “Electronics” category.
- Add a Conditional Split to check if the user opened the email.
- On the “Yes” path (they opened it), add a Wait step for 24 hours, then maybe send a Push Notification or SMS with a gentle reminder.
- On the “No” path (they didn’t open), wait maybe 4 hours and then send a different email with a better subject line, maybe showing some customer reviews for the products.
- You can keep building out the journey based on what users do next (like clicking a link or finally making a purchase).
- When you’re happy with the flow, click Publish Journey.
Pro Tip: A/B test everything inside your journey. Try different messages, different wait times, and different dynamic content to see what actually works. Small tweaks here can have a huge impact on your results over time.
Common Mistake: Building a ridiculously complex journey with no clear goal. Keep it simple. Every journey needs one objective (e.g., get the purchase, win back a user). Every single step in that journey has to work toward it.
Expected Outcome: You get automated journeys that adapt to user behavior in real time, driving conversions and making customers feel like you’re paying attention. This kind of proactive engagement almost always gets higher conversion rates than old-school batch-and-blast campaigns.
Step 5: Monitoring and Iterating on Contextual Memory
Getting your events, fields, and journeys running is just the start. The real work is in the continuous monitoring and tweaking, because customer behavior changes and data gets old fast. You can’t just set it and forget it.
5.1 Review Event and Field Usage
Make a habit of going to Settings > Events and Settings > User Profile Fields to look at the usage stats. Are your events firing like you expect? Are fields being populated? If an event you’re relying on has a low fire rate, you need to go investigate the integration right away.
5.2 Analyze Campaign and Journey Performance
Dig into the analytics for your personalized campaigns and journeys. Look at open rates, click rates, and especially conversion and unsubscribe rates. See how your highly contextual segments are performing against more generic ones. The patterns will tell you what’s working and what isn’t.
5.3 Refine Personalization Rules
Based on what you find in your analysis, go back and tweak your Handlebars logic and segment definitions. Maybe your product recommendation logic is off, or a segment is too wide. This iterative process is how you stay relevant.
Pro Tip: Set up alerts for any big data problems, like a critical event that suddenly stops firing. I’ve seen entire automated journeys break for days just because a backend integration failed and nobody noticed. Early detection saves a lot of headaches.
Common Mistake: The “set it and forget it” mindset. Your contextual memory is a living thing. If you don’t give it regular attention, the data gets stale, the personalization feels dated, and you lose all the benefits. Schedule time every month to review and improve.
Expected Outcome: The whole point is a personalization strategy that keeps getting better. It adapts to what your customers need, which is what grows customer lifetime value and keeps them loyal.
When you get good at using Iterable’s contextual memory, your marketing stops being so reactive. You’re not just blasting out campaigns. You’re building adaptive journeys based on well-defined events and user data. This is how you create a brand experience that actually feels personal and is essential for maximizing reach in 2026. When customers feel understood, it does wonders for your AI brand sentiment metrics, because you’re sending them things they actually care about.
What is contextual memory in Iterable?
It’s Iterable’s system for remembering everything about a user, their actions, preferences, and attributes, by using custom events and user profile fields. You then use all that stored information to send them personalized messages in real time.
How do custom events differ from user profile fields?
Events are for actions, things a user *does* at a specific moment, like “product_viewed” or “video_watched.” Profile fields are for attributes, things a user *is*, like their “firstName,” “loyalty_tier,” or “preferred_category.” Events are a stream. Profile fields are a state.
Can I use contextual memory for channels other than email?
Yes, absolutely. The data from contextual memory is available everywhere. You can use it to personalize push notifications, in-app messages, SMS, and web pop-ups, any channel you’ve connected to Iterable. It’s designed to create a consistent experience across the board.
What are Handlebars helpers in Iterable?
They’re basically little functions you can use in your templates to do more advanced stuff. They let you run complex logic or look up data that isn’t directly on the user profile, like fetching product recommendations from your catalog based on a user’s browsing history.
How often should I review my contextual memory setup?
You should be checking your events, fields, and personalization rules at least once a month. It’s the only way to catch data problems early, adapt to new campaigns or customer behaviors, and make sure your personalization doesn’t get stale.


